5.6.10

Finished With General Welding! Generally

The Rear Triangle

Chain Stay Taper:


----------->


----------->

MIG weld & grind. Place Henry James plug-in dropouts within. Place in Jig with seat tubes. Align. Weld.

----------->

I tapered the seat tubes by cutting them at arbitrary angle and then placing a small piece of metal on top and then welding and grinding. The seat tube to seat stay weld was by far the most difficult on the bike.


Butt Welding


Nope


---------->


Yep

2.6.10

Finally! In the God-Damned JIG

Is the inspiration for:


This bike.

He's tall, it's tall, everybody's happy.

The tubes came from two old JCPenney bikes, a male and a female pair. These bikes were pretty rusted and broken (pulverized). I chose the bikes because they had the same diameter tubes, so I could butt-weld them together to get a taller frame.

The frame design:


(You have to click on it and zoom in to see the actual design)


Is loosely based off of the Surly long haul. It's not the most novel bike around, but the information on sizing was easy, and I know from reviews it's a solid bike. Here are some of the specifics for the bike:

Seat Tube Length
(Center-Top)


630mm
Top Tube Length
(Center-Center)


625.0mm


Head Tube Angle


72.0°
Seat Tube Angle


73.0°
BB Drop


50.0mm
Chainstay Length


460.0mm
Wheelbase


1085.3


Head Tube Length


210.0mm
Fork Length


390.0mm
Fork Rake


45.0mm

I followed the Paterek method for designing the bike. You do this once, you get it down pretty quickly.

Mitering is tough and I thank cutting fluid for its help. I love you, cutty. Special thanks also to TI, Usher, and Aaliyah for their musical support. Now - the rear triangle. Tall bike is welded, being painted now as a giraffe by a friend.


(Apologies to the female friends)

18.5.10

Big Day Today

Lots of work to get done.

16.5.10

I'm Screwed

The deepest, darkest, hairiest pits of depression, despair and deprivation will soon be exposed (keep your mind out of the gutter). In this post I will let you know my true secrets, my Turkish Gold and Goldilocks fantasies; My Peanut Butter and Jelly; the apple of mine third eye. YOU (you internet square) - Get to know - ME (another internet square).


http://bullionbargains.us/images/1909-turkey-100-piastres-gold-coin-pic.jpg

+

http://www.danzfamily.com/archives/blogphotos/08/898-peanut-butter-jelly.png

+

http://leonardcohensearch.com/wp-content/Graphics/Goldilocks-3bears-consultant.jpg

=

http://jp-graphics.net/wordpress/wp-content/uploads/2009/11/Third-Eye-Smiley_2a.jpg
I am scared. Scared that I will not finish my projects. I have three weeks to:

1. Finish a tall bike.

This includes attaching the two separately welded triangles together, finishing a fork and putting the chain/ seat stays on.

2. Design and weld a front rack.

Should take a day, for a friend of mine, who has been really really generous to me as of late.

3. Design and build THE BIKE!

I don't even want to get into the details.

On top of all this, I have massive amounts of academic work, a summer job to follow up on, a sailboat to fix up and heaping serving of college senioritis to digest and secrete (hopefully soon, I can't handle the constipation). Not to mention I am living off of less than $100 .00 this month.

I am very, very concerned and therefore extremely concerned. Please lend me your support. By clicking on the add banners on the side of this post you will make my wallet a bit heavier and my ass a bit stronger.

God speed, ranger. You have entered the realm of my emotional head space.

Thanks for reading this, I hope I didn't overexpose my deep and dark hairy under locales (I told you not to go there)

8.5.10

Designing and Making (out with) My Tall Bicycle

Figure 1: My Hero

Everyone needs a hero, even you, you confident soul! You can check out this dude on the webosphere, here:

Cyclingwmd.blogspot.com

The Tall Bike Project (TTBP) has been coming together. Today I welded most of the upper triangle.

Here is the design drawn to scale:


I recycled all of the tubes from broken frames. I used a hacksaw near the joints, sand blasted the tubes and then used an angle grinder and power sander to get rid of the excess welds, braze-ons. Here are the finished tubes after mitering (see previous post):


Jig fitting came next. The Jig was made by an Olympian named Thomas of Bombus Bikes. You can check out their blog, here:

http://www.bombusbikes.com/

Its pretty amazing to have this jig at my disposal. Here it is fitted with the mitered tubes of the bottom triangle:


This is a "practice" bike. One where its ok to mess up welds. I did a pretty good job of that today. Here is how I went through the process:

1. Fit in jig, make sure angles are correct and all that.

2. Tack with the MIG. 4 tacks per tube at opposite points on the tube.

3. Weld with the TIG.

I decided God may not have granted me welding skills, and maybe there's a reason my dad wears white collars instead of blue. Dig? Nah, I think I just need a lot of practice. By the end of the day I was getting the hang of it, but getting the tungsten in those little corners is quite difficult. Resting on the corners of the tubing helped quite a bit. Here are the problem child welds of the day, stay tuned for progress:


Eeeeewww

Mmmumuumm? Some decent tackies on the MIG.

30.4.10

Mitering

I'm using a down-loadable mitering calculator found here:

http://www.ozhpv.org.au/shed/files/tubemiter.exe

Mitering is the fitting of two tubes. You can't really just weld two tubes that hit each other at a 90. You probably could, but you'd have to be a better welder than I.

Here is my process of mitering:

1. Open the application and type your specifications (Fig 1):

Figure 1: Miter Program

It will ask you to enter the wall thickness (gauge) and diameter of tube to be mitered as well as the wall diameter of the joining tube. The hardest thing about this program is figuring out the relevant angle. The angle calculation only measures tubes meeting in parallel (i.e. down tube to head tube) not tubes meeting in perpendicular (i.e. down tube to bottom bracket). I hope that makes sense for you, because it took me awhile to figure that out.

2. Print out the paper and wrap around the tube (Fig 2):

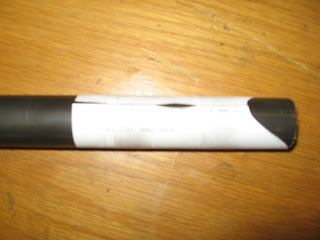
Figure 2: Wrap before you... miter!

I think this is pretty straight forward, use low stick tape so that you can remove it easily if need be.

3. Draw your line with a sharpie and remove the mitering paper, double checking the angle given by the paper with the tube your about to join to. Make sense? No? Look at the damned figure! (Fig 3)

Figure 3: Checking it twice.

4. Put the tube-to-be-mitered in the vice, clamp down and start sawing away. I've been using two methods.

A. Use hacksaw to make rough cuts and then smooth with a half-round file and round file.

B. Make rough cuts with a air powered saw, I am not sure what they're exactly called.

The air powered works much faster, but its a lot easier to take to much off. I enjoy working with my hands but have time dilemmas so I am mainly using method B.

One thing to make sure of is to thin the convexities, or peaks (as opposed to concavities and troughs) of the tubes while cleaning with a file. The highest point of the miter should be somewhat thinner the rest of the tube - as has been told to me. This makes the tubes sit together a bit nicer. On the miter print out itself there are little jetty lines that rise above the main cut out which denote the areas that can be thinned.

Hallelujah!


20.4.10

Every1 Needs Something 2 Weld 2: Some Vibrations for Your Cochlea

https://blogger.googleusercontent.com/img/b/R29vZ2xl/AVvXsEikpaDmsPReJd_41mNjDS6HpkJHxIHz3tV8ZVB3jwJXYGQDDDig8tMch0c-bCcLOTaC5VSn7T5xNT2dvaMIJ-um8GDqvdiveGzsiQBkFql76FnNk12wOBl_VzY9htmekCiW-jqGvL8huo0n/s400/Twisted-Sister-Come-Out-And-Play-423158.jpg
All time Favorites

I've been putting in the hours in the metal shop, really trying to get the TIG down. I feel like a dragon slayer, slaying beasts. You know what I'm saying? Strong player, different game.

In order to soothe my frequent tachycardia, I've developed a fine taste of music. For instance, the new foe-80's phenom from Stones Throw Records:


And of course there's Quasimoto, also from Stones Throw. There's something about this collection of artists that produces a great feeling. I know other artists share this feeling, for instance the SF based illustrator jason jagel. You can check out his website here -

http://www.jasonjagel.com/

Here's Quasimoto


There's some kind of urban mysticism or playground that this music curates that's great for welding.

This music is super chill - rococo rot:


Enjoy

19.4.10

An Ode to the Tall Bike

Hello, tall bike. You mean something to me. I'm thinking the best way I can express this to you. Ummm, let me think. You're cool, no, no... I mean you are, but, really, I mean to say that, your, your... I think we should be friends. Do you know what I mean? Like, do you have a cellular telephone or, ummm, an email address or some way that I can contact you. You know, just friendly matters, hahaha...

In order to gain the skills I need to gain to build a legitimate bike with legitimate welds, I will be building somewhat of a side project. Yes, you guessed it, a tall bike. I know, I know - I live in the Norhtwest, I'm building a fixed gear and tall bike (or trying). But you know what, when you go the circus, you go the circus - that's what my Dad told me anyways (we used to share a couple things of garlic fries at candlestick park in San Francisco). So there you have it, a tall bike. Here is the design which I'll use as a template, it's pretty standard (Fig. 1).

2113051441_16ef6a0e31_b
Figure 1: Tall Bike

16.4.10

TOTALLY TIG (welding) TUBES

This video shows the skills you need to have to get a clean TIG weld between two tubes:


13.4.10

Practice Make Puurrrfect - Intro to TIG

Figure 1: The Shop

In the case that you didn't know, I have no welding experience. Therefore, I need to learn. I've been putting in hours on the oxyacetylene and TIG machines (Fig. 1, 2). I've found that you need to put in about 4 true hours to each machine to start getting things that actually look like welds.

Here is a description of the TIG welder - what I'll be using for all of the frame tubes.

TIG welding sytem setup
Figure 2: TIG

You can fuse together all types of metal (including Aluminum). Here's the basics:

You have an electric current running through the table (which is a big piece of metal) and a current running through your tungsten filament (gun). Press on the foot pedal and you increase the electrical amplitude (more heat through the gun) (Fig. 3).

http://www.stellite.co.uk/Portals/0/Welding%20Processes/process_tig.jpg
Figure 3. The Tungsten Electrode and Chamber (the gun)

So you heat up two adjacent pieces of metal with the electrode and create a pool of molten steel (not lava) (Fig. 4).

http://www.filterforge.com/filters/1316.jpg
Figure 4. Cascadian Lava

You then take your filler rod (a stick of steel metal copper plated) and press it into this pool. Everything is happy and melted together and when you release the heat, the two pieces of metal are strongly bound. The trick is to "bead" nicely, so you move your pool and filler rod at a consistent speed and push the filler rod in every few millimeters. These are the kind of welds you'll get if you're a beginner like me:


Figure 5. Practice Welds

And these are the types of welds you get when you've been welding for some time:

http://www.weldingtipsandtricks.com/images/tig-welding-tips-aluminum-weld.jpg
Figure 6. What I Strive to Be

8.4.10

Velo-ciraptor - Predictions


This is called the velociraptor, it has nothing to do with the bike I am building, I just thought I post a picture of the fixed-townie I enjoy riding. It's a bit goofy- but riding trails / streets are both pretty fun. That is a baguette in the water cage and on the handlebars, the tire I am going to mount on the rear - I hope the Bike Snob doesn't see this one. Clicking on the picture will take you to a link that makes the Photoshop edits really apparent.

On a side note, I was looking at the Bike Snob's (NYC) blog earlier and I am going to steal one of his topics only because I predicted this something was going to happen. "Fixed speed bikes" sold at Walmart (Fig. 2). They are actually single speeds, but they have a misleading name. If you break down the wording it is actually truthful, one - fixed - speed, not gear.


Figure 2. Where would department stores be without Mongoose?

6.4.10

Tim Paterek Manual - Lug vs. Tig

Figure 1. Tim Paterek's Manual

Check this bad baby out. I've just skimmed it, but I 'll be reading the WHOLE thing, swear. I mean, its even got an index and it probably weighs as much as my organic chemistry textbook (Fig. 1, 2).

Figure 2. The Insides

From what I can tell, Mr. Paterek is a fan of lugs, which got me kind of interested in lug vs. TIG welding debates. I found this article debating Lug vs Tig from Rivendell (a lug supplier), which to sum, shrugs it shoulders and reverts to, what the English call, blibber-blabber.

"But a lug is a lug, and a tig-weld ain't."

Why Lugs are Good

  1. Lugs strengthen the frame at the joints
  2. Lugs allow brazing, which we believe is the kindest, gentlest way to join tubes, and certainly the one which allows the easiest tube replacements.
  3. Lugs are interesting to look at, and over the years there have been hundreds of styles, some proprietary, some generic, some plain, some intricate, many just plain beautiful. All lugs are interesting. When you look at a frame joint formed with lugs, there's something to look at.

Lug macro photoLugs used to be the preferred way to build fine bicycle frames. Then makers discovered tig-welds, and almost overnight (considering the long, 90-year reign of lugs, the 6-year period between about 1981 and 1987 constitutes overnight), tig-welding took over. It is a strong way to join tubes. It is efficient. It has proven its merit thousands of times over. A body can appreciate a good tig-weld, and should appreciate the skills that go into it. But a lug is a lug, and a tig-weld ain't.


They are beautiful, no doubt it - but I don't know - if I did choose to Lug design, I feel like some naked minimalist would be pacing behind me furrowing his brow (looking real concerned). Here is another article which supports lug soldering rather than welding:


WHY WE STILL USE LUGS
Our steel frames are lugged for two reasons. Lugs are stronger and lugs are beautiful. Did we mention that Lugs are stronger? Almost all mass-production steel frames produced today utilize cost-effective tig welding to join tubes. This prompts a question: why do we still use silver soldered lugged joining? There are two basic answers. First, properly fitted and soldered lugged joints are considerably stronger than joints created any other way. Second, they give us and other traditional builders a way of showing off. We can demonstrate, not only our soldering skill, but also how we believe a frame's details should appear.

On Strength
In the late '80s, a team of scientists in the UC Davis engineering department undertook an in-depth look at the relative strengths of various steel joining techniques at the request of "Bicycle Guide" magazine. The three top frame builders associated with the three primary joining techniques were asked to supply joining samples using tubing supplied to the builders from the same mill run. Tom Ritchie provided the fillet-brazed samples, tig-welding was done by Gary Helfrich, and the silver soldered lugged samples were done by Spectrum's Jeff Duser. The samples were fatigue tested, in some cases to failure. In most cases, the joints did not fail. More often, the tubes failed at or near the joint. The team's study involved microscopic analysis of the crystal structure of joining zones, heat effected zones and failure sites. They concluded that all three joining techniques, done properly, are clearly of sufficient strength for the purpose of bicycle frame construction. The different results obtained from the samples resulted primarily in the heat-affected areas of the tubes themselves. Not surprisingly, the tubes that were soldered turned out to be stronger than the tubes that were welded or brazed. So, what does this mean in the real world? Frames built with silver soldered lugs will last longer than those that are fillet brazed and considerably longer than those that are welded. However, for most of our customers, the real practical difference is that lugged frames hold up in crashes better, and when it becomes necessary, they are much easier to repair.


So there is a lot of merit to Lug design - ease in tube repair, stronger, and arguably more beautiful (maybe easier to put together as well? - I'm not experienced so I don't know). I hope some boot strapped practical vintage-head (conundrum?) won't be strolling along behind me when I decide to choose TIG over LUG (both three letter words that end in G, by the way). The only reason I'm choosing TIG, I would tell him, is because I've gotten advice from other experienced people, because I myself, don't really know all that I'm getting into. "This is my first bike!" I would beg as he took out his 1940's era buck knife and tried to finagle me into some kind of novel 1/2 nelson. I just hope the naked, and modern, minimalist would be there to fend off the incoming dude.


4.4.10

Referencing


I've been gathering references from bike shops and internet search engines about frame building and what not. Here is a list of what I have now, I will continually update this list via a blogpost edit:

Obviously:
http://www.sheldonbrown.com/

Materials:
http://www.bikeschool.com/store/index.cgi?id=857691512495&d=single&item_id=KA-019&c=Steel_Tubing&sc=4130_Standard&tc=
http://www.cycle-frames.com/bicycle-frame-tubing/
http://www.henryjames.com/
http://www.columbustubi.com/eng/3_3.htm
http://sfcyclotouring.blogspot.com/2006/07/about-steel-tubing-used-in-bike-frames.html
http://specialtymetalscorp.rtrk.com/?scid=1708239&rl_alt=http%253A%252F%252Fwww.specialtymetalscorp.com&rl_path=/index.php%3Foption%3Dcom_content%26view%3Darticle%26id%3D25%26Itemid%3D53

Methods:
http://blogs.phred.org/blogs/alex_wetmore/default.aspx
http://www.alteredcycles.com/

Computer Programs:
http://www.bikeforest.com/CAD/index.php# (free frame building program)

Way more to come - but I gotta run!

2.4.10

здравствуйте (hello!)

My name is Jack (fig. 1) and I'm super velo (as in, I enjoy velociraptors) but more importantly a Geoduck (an Evergreen State college student). In an independent student contract (an example of project based learning; where students work with professors and create their own class) I will be building a bicycle this academic quarter and will be documenting the process throughout. I will be using the Paterek Manual, 3.0, by Tim Paterek and experienced Olympia locals as reference. The frame will be steel, a 48 cm fixed gear made by TIG (Tungsten Inert Gas) welding.

If you're interested stay up - I will be updating this blog biweekly for the next 9 weeks.

прощание. Wish me luck!

Madrid by you.
Fig. 1